Menudo

There are very few things, if any, that scare me in the kitchen. As an avid eater, I’ll pretty much try anything and love diving into the rich history and culture behind all food. And, for the most part, there really hasn’t been a recipe I’ve come across or food I’ve wondered about that gave me pause when attempting to recreate it in my own kitchen… except for one thing… menudo.

Menudo has always just been there for me. It’s comfort food. I grew up eating it. For those who don’t know about menudo, it’s a traditional Mexican soup that’s made from (just wait, don’t go anywhere) cow’s stomach, pig’s feet, hominy, and seasoned with Mexican oregano and a red chile sauce.

You there? Are you still reading? Hello? Okay, good. I promise. It’s delicious! I love it!

My Aunt Adelma is a Master Menudo Maker, and she was even our “Madrina de Menudo” (Godmother of Menudo) for our wedding! We didn’t have Padrinos de Lazo or Arras (Godparents of the Rosary or Coins) – we had Padrinos de Menudo (Godparents of Menudo), okay? No joke.

That’s how important menudo is in my life.

When I show up on Sunday at any Tex-Mex or Mexican restaurant, it’s on the menu. When we have a Christmas or New Year’s Eve family party, it’s being served. When I take Sunday breakfast over to Grandma Ollie’s, it’s right next to the pan dulce and barbacoa. When I have a hankering for menudo, it’s never more than a few miles away, waiting for me to christen it with a sprinkle of cebollita (onion) and a splash of lime juice. But, I’ve never attempted this sacred dish in my own kitchen.

Why, you ask?

Because even though I know the flavor profile, basic ingredients, history, and process, I was scared it wasn’t going to live up to the menudo in my head! I didn’t know if I was ready to hit up this iconic labor of love. I was terrified that I was somehow going to bring shame to Aunt Adelma’s signature dish and end up with some pathetic, watery mess. (Plus, it takes forever to cook and stinks to high heaven when it first starts to cook. So, I really never had the desire to make the magic happen within my own four walls, especially when I knew where I could order it.)

Yet, two days ago, as I was thumbing through one of my Ma’s favorite recipe books, the menudo bug bit me.

I was going to make it; I was going to stink up my brother’s house to do it, and it was going to be amazing.

After researching for hours, reviewing about 15 menudo recipes, making calls to New Mexico and South Texas to get any input from relatives, I was ready to create my own approach, and I was determined to avoid using any “menudo mix” in the process, a packet of spices most grocery stores carry in the spice aisle. I was going 100% authentic – all the way.

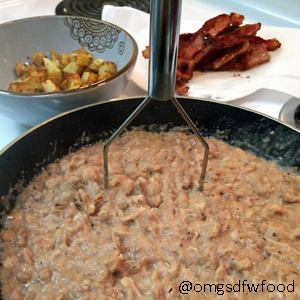
First thing was to create the Chile Colorado, a red chile sauce that gives both the flavor and rich red color to the menudo, and I was going to use Bear’s Grandma Julia’s base recipe to get started. This recipe is something that Bear remembers growing up in Las Cruces, and he said this was the base sauce for many of his grandmother’s dishes. The only thing I added was the onion to help mellow out any bitterness from the chile (I know, total Texan move – sorry, Grandma Julia – I’m not New Mexican enough to do straight chile.)

Chile Colorado Sauce
During this step, be sure to either use gloves and/or avoid touching your eyes. The chile capsaicin will hurt like Hades if you get it in your eyes or any sensitive areas.
4oz Dried Whole New Mexico Chile Pods
1/2 Onion, quartered
3 Garlic Cloves, minced
2 tsp Salt
Water

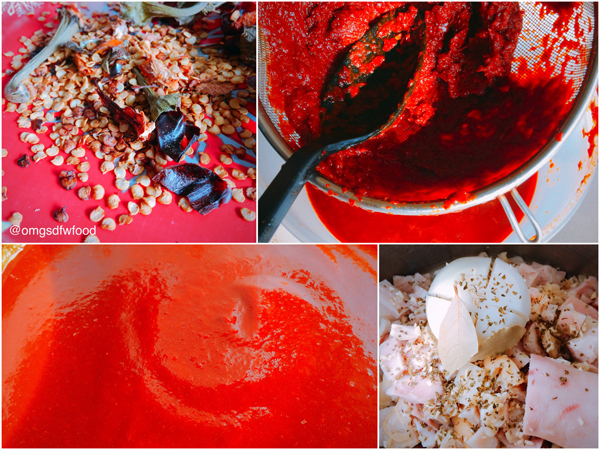
Remove the stem from each dried chile pod, and then shake out any seeds from within each pod.

Add the de-stemmed/seeded chile pods, the quartered onion, and salt to a large pot and cover with water just until the pods are covered. Heat over medium-high and bring to a boil, using tongs to flip over the chile pods to ensure all sides are met with boiling water.

omgs-dfw-food-menudo-4
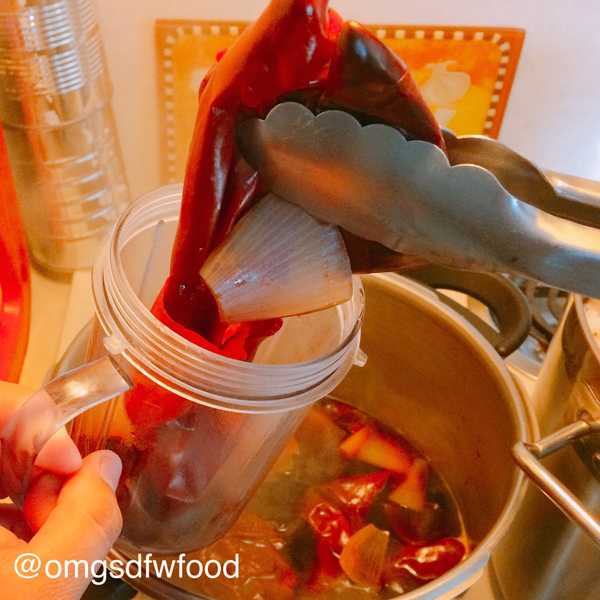
Once the chile pods have softened and the onion is cooked through and nearly translucent, use tongs to remove the soft chile pods and onion, and transfer ingredients to a blender. Do not use any of the water that was used in the pot, as it is bitter and will ruin the sauce. Discard the boiled water.

To the warm chile pods and onion in the blender, add minced garlic; then, add fresh water to cover half of the contents only. Blend on high until the mixture creates a paste-like consistency. The sauce will have a similar appearance to a thick/chunky tomato sauce.

Remove the contents of the blender into a fine mesh sieve, and using a spat or spoon, work the contents through the sieve to create a beautifully bright, velvety red sauce absent of any chile or onion pieces. Set aside.

This is Chile Colorado! You can use this sauce as enchilada sauce, seasoning for meats, and/or use it for menudo.

Menudo
2 lbs Beef Tripe
1/2 lb Beef Honeycomb Tripe
2 Pig’s Feet, split
2 TBS Mexican Whole Oregano
1 Large Onion, quartered but attached at the stem
4 Garlic Cloves, minced
2 Bay Leaf
1/2 Lime Juiced
2-4 tsp Salt
3 15.5oz Can White Hominy
Chile Colorado (4oz recipe above)

Notes: 
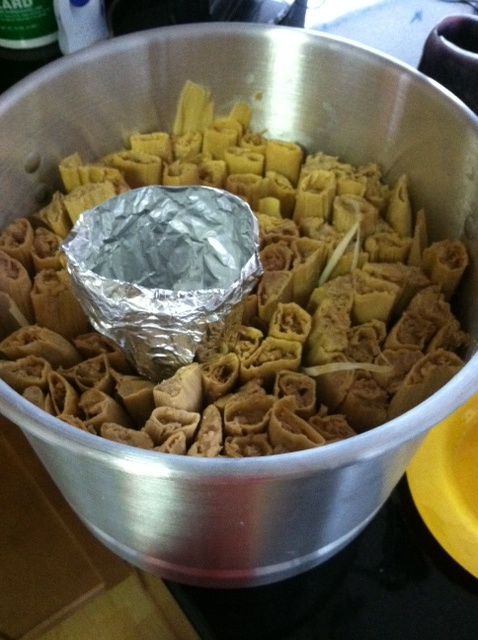
It’s very common practice to open the windows or doors when making menudo because the initial boiling of the tripe can be quite aromatic.
Beef tripe can be found in most Hispanic markets, and if honeycomb tripe is unavailable, add 1/2 pound of regular tripe instead.
Honeycomb tripe looks exactly as you think it might, a honeycomb.

Remove one end of the onion, leaving the stem side intact. Using a knife, gently quarter the onion without going all the way through the stem. The onion should hold together and just add flavor this way. Set aside. Thoroughly rinse the tripe and pig’s feet under running cold water in a colander, making sure that every part has been washed over with water.

Cut the rinsed tripe and honeycomb tripe into bite-sized pieces. Add all the rinsed tripe, pig’s feet, quartered onion, minced garlic, 1 TBS of Mexican oregano, 2 tsp of salt, and two bay leaves to a large stockpot (10qt).

https://youtu.be/R2jGrPk_HnY
Cover the ingredients with water, and fill the 10qt stockpot 3/4 full. Spin the onion if you like a little pizazz while cooking. I know I do.

Bring the stockpot to a full, rolling boil and let boil for approximately three hours, watching the water level closely. You can reduce to a medium-high simmer and cover after the first hour, but a constant low boil is necessary for the full three hours. After three hours, add the Chile Colorado and remaining Mexican oregano to the stockpot. Continue to boil for another hour. After the fourth hour, taste and add the remaining salt if necessary. Add the lime juice and hominy to the stockpot. Continue boiling covered for another 30 minutes.

omgs-dfw-food-menudo-13
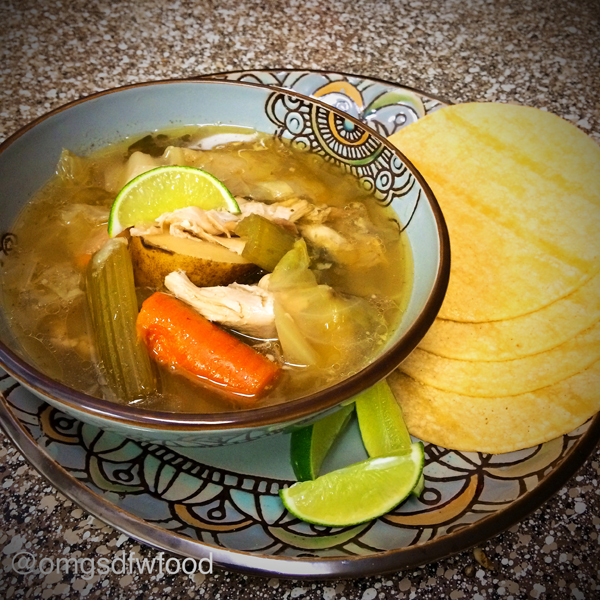
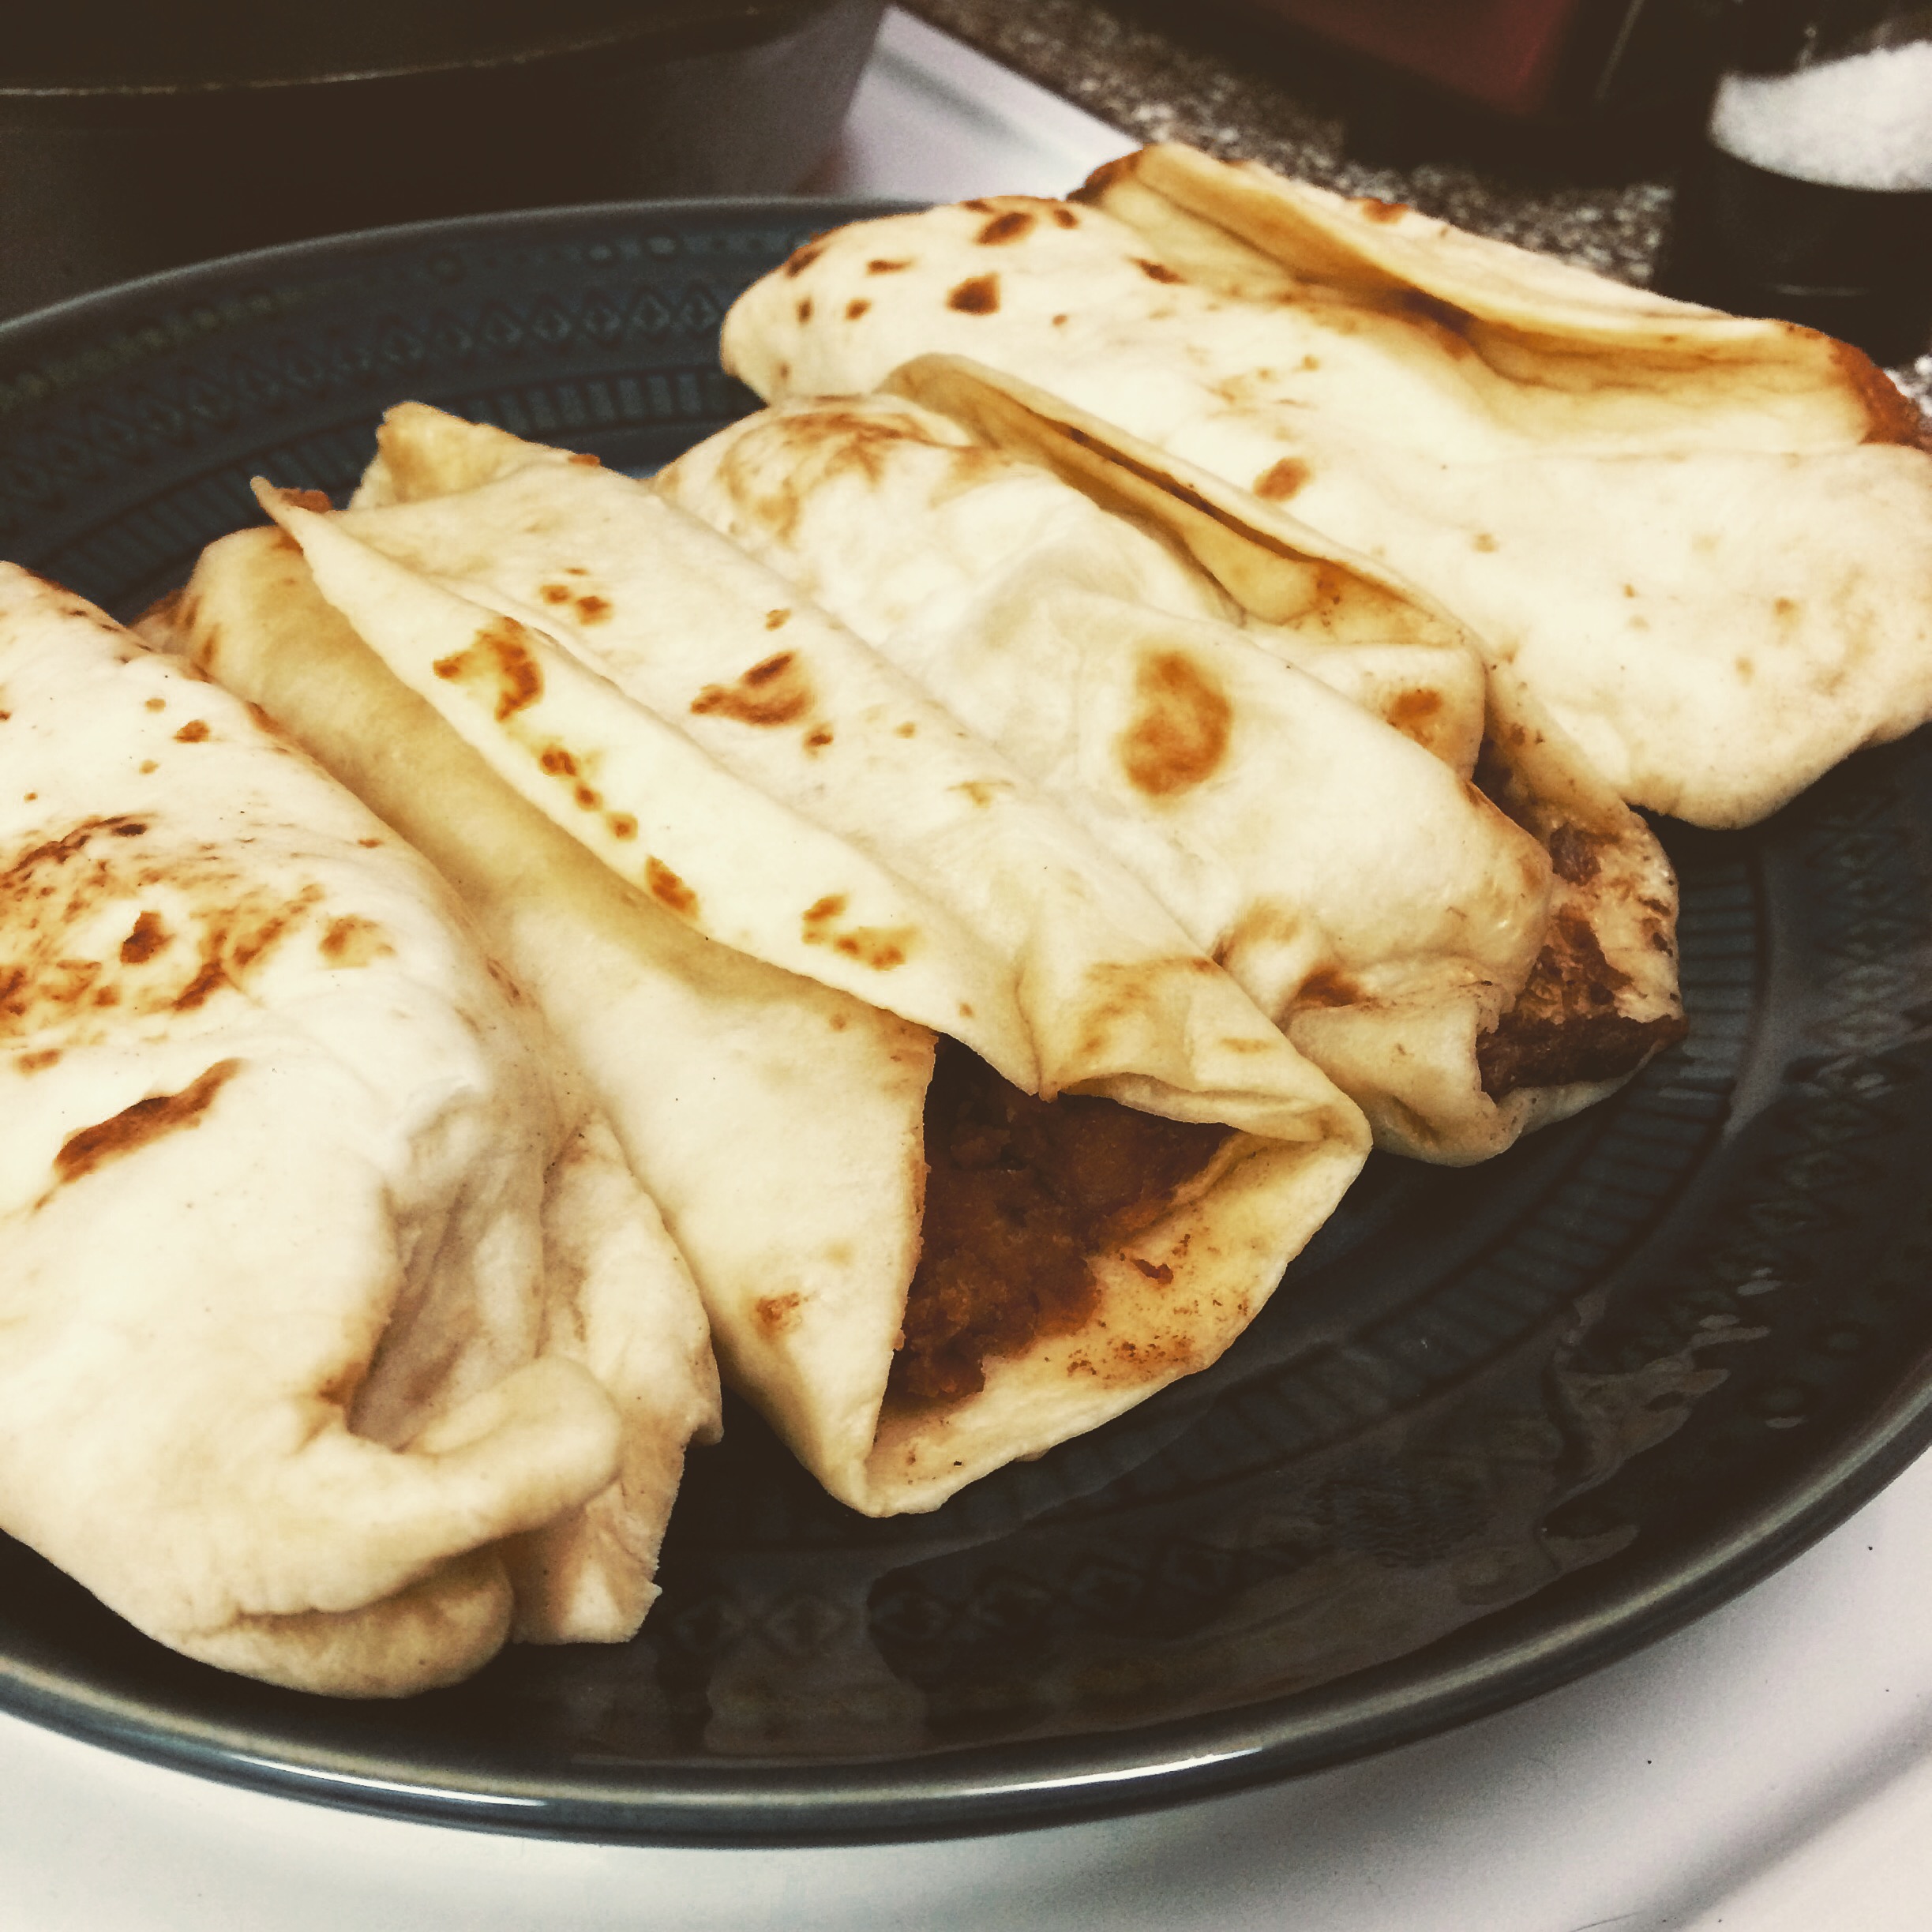
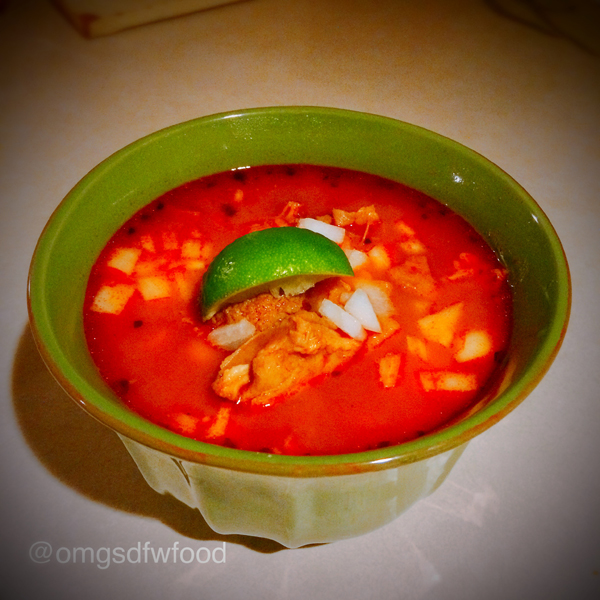
Menudo will be finished when the tripe is tender and nearly melts in your mouth when chewed. Garnish with chopped fresh onion, additional Mexican oregano, and a squeeze of lime. Accompany your menudo with corn tortillas heated on a comal (South Texas style) or with a buttered and toasted bolillo or hoagie roll (New Mexico style) that can be found in any market.

This was, by far, one of my greatest kitchen accomplishments, and that’s not me bragging. You know I would tell you if it was a disaster. Thank God it wasn’t!

My entire family loved it, and I was just so happy that this labor of love turned out so well that I needed to share the recipe.

It made me so proud to use Grandma Julia’s Chile Colorado base recipe, and it made me proud that my Grandma Ollie loved it so much once it was done.

Never again will I fear a recipe. When you love cooking and love the culture behind the food, that love serves as the perfect seasoning to make any dish sing. Well, that and research and remembering what you did by writing it down. But, you get the picture. ¡Buen Provecho!

Caldo de Pollo

Brrrrrrrrrr… it’s chilly up in here! North Texas may not inspire tundra-like weather, but it has officially hit the freezing mark; and, that can only mean one thing: Caldo!

Growing up in South Texas, it rarely dipped past the 40’s, but when it did, it was like the Bat Signal went up for all the abuelitas to kick into high gear and get those ollas (cooking pots) out and fill them with warm, delicious broth that overflowed with hearty potatoes, calabaza (large green squash), carrots, and celery atop large pieces of chicken that fell right off the bone. And, while I’m nowhere near abuelita status, that doesn’t prevent me from hauling out the ol’ enamel-covered cast iron 7-quart dutch oven I like to call Pun’kin… ‘cus she’s orange, large, and in charge.

You should also know that you can swap out the chicken for large chunks of beef rump roast and swap the Knorr Caldo de Pollo Bouillon Seasoning for Knorr Caldo de Tomate Bouillon Seasoning and get Caldo de Rez (beef soup). If you do this, add some fresh corn cobs cut into thirds when you add the cabbage. Everything else is exactly the same.

In the fitting words of Bernardo, “Vamonos, muchachos!”

Ingredients:
1 Large Green Squash
4 Large Carrots
3 Large Stalks of Celery
5 Medium Potatoes
1 Large Onion
1 Small Whole Green Cabbage
1 Bunch of Cilantro
4 Chicken Quarters or 1 Whole Chicken Cut in Fryer Parts
3 TBS Knorr Caldo de Pollo Bouillon Seasoning
2 TBS Vegetable Oil
6 Garlic Cloves, diced
1 TBS Cumin Seeds
2 tsp Whole Black Peppercorns
Cumin Powder (optional)
Garlic Powder (optional)
Black Pepper (optional)

Rinse and dry all of the vegetables. Cut the squash, carrots, and celery into large 2-inch chunks, and set aside. Cut the potatoes in half, and set aside with the other veggies. Quarter the onion, removing the ends and peeling the outer layer. Core the cabbage, and cut the cabbage in half and then into large chunks. Do not worry about separating the onion or the cabbage, as they will fall apart in the soup. Set all the veggies aside. And, on a separate cutting board, separate the chicken quarters if they are not already cut into fryer parts. Then, liberally season the chicken all over with the Knorr Caldo de Pollo Bouillon Seasoning. You can find this seasoning at your local grocery store right next to the bouillon or in the Mexican/International aisle.

Get out your version of ol’ Pun’kin (large stock pot), heat to medium-high on the stove, and add the vegetable oil. Once the oil is hot, add the seasoned chicken to the pot, being careful not to overcrowd the pan at one time. Brown the chicken on one side, then turn over. When you turn over the browned chicken, add the squash, carrots, celery, potatoes, and onion on top of the chicken. Then, cover the ingredients with warm water, leaving some space for stirring and adding the cabbage. At this point, you’re deglazing the pan with water, removing any bits of the chicken from the bottom. Use a pair of tongs to gently stir up the bottom to remove all the wonderful yummy bits, being careful not to splash. Bring the pot to a rolling boil.

When you’re bringing the pot up to a boil, in a separate small skillet, add the cumin seeds. Place the skillet on medium heat, and toast the cumin seeds for about two minutes. Once you can smell the cumin, remove it from the heat, and immediately place the toasted seeds into a molcajete (mortar and pestle). To the cumin seeds, add the diced garlic and peppercorns. Take out any aggressions from a possible bad hair day or any other disaster, and smash those suckers into a paste, just like Grandma Ollie taught us how to do. Then, add some warm water to loosen the paste.

Once the pot is up to a rolling boil, add the watery cumin, garlic, and peppercorn mixture to the soup and stir. If you do not have a molcajete or mortar and pestle, do not fret. Whip out some cumin powder, garlic powder, and black pepper. Add one heaping Tablespoon each of cumin powder and garlic powder; then, add one teaspoon of black pepper. Then, go buy a molcajete. There’s no reason why you shouldn’t have one. They are cheap and are needed to truly create that magical seasoned paste that gives life to most Mexican/Tex-Mex dishes.

¡Andale! Go buy one after you eat caldo!

After you’ve stirred in the key magical cumin, garlic, peppercorn mixture, take the cabbage, and simply place the large chunks on top. Rip up the bunch of cilantro, and then place that on top, as well. Reduce the heat to medium-low, and cover the pot. Let simmer for 45 minutes to an hour. Be careful not to let the caldo over boil. If needed, leave the lid partially open to prevent overflow of precious caldo broth, and stir occasionally. This is the kind of soup you can leave on the stove simmering all day while you serve from the pot until every last drop is gone.

Once the chicken is falling off the bone, ladle the soup into a bowl, making sure you get at least one of every vegetable in your bowl. Serve with warm corn tortillas and a squeeze of fresh lime.

In our household, my Grandpa always used to eat corn tortillas with mayonnaise (don’t knock it ’til you try it), and that’s exactly how I eat my caldo. I slather some mayo on my corn tortilla, roll it up, and dip it into that warm, comforting broth. It brings back such wonderful memories of Grandma Ollie, as well as my Ma, making caldo and me sitting in my warm pajamas, eating right next to Grandpa at the kitchen table at the ranch.

May this soup warm you up – heart and soul.


Holiday Party – Chocolate Cherry Rum Spiced Tartlets

Turkey Day down and Christmas to go! We’ve just tackled that one day of the year where we bake and cook nonstop for 48-72 hours to enjoy about 30 minutes of eating, and now we’re onto the holiday season of never-ending Christmas parties, holiday gatherings, and all things dessert! Now, whether you’re hosting a holiday party or want to bring something over to someone’s house, this is a quick and easy delicious dessert that involves two of my absolute favorite ingredients: cherries and spiced rum! Okay, three… and, chocolate!

This “no frills” recipe packs a solid punch of flavor without too much fuss, and you can make everything ahead of time, too. Also, it has one major shortcut that will save you tons of time and a few dishes to wash. I’m all about making things from scratch, and I’m also all about not having to wash a million dishes after I’m done. These tartlets meet the “scratch baking with minimal dishes to wash” criteria.

Ingredients:
1 Package Fresh Cherries, halved and pitted
1/3 Cup Sugar or Truvia
1 TBS Mexican Vanilla Extract
1 tsp Chocolate Extract
1/2 Cup Spiced Rum
1 Cinnamon Stick
1 TBS All-Purpose Flour
24 Dollops Sweetened Whipped Cream
1 Small Bar of Dark Chocolate
1 Box Ready to Bake Pie Crust Top and Bottom (2 rolls)  <—- major shortcut

Preheat your oven to 350°. Set aside two mini muffin tins.

Into a small saucepan and off the heat, add the halved and pitted fresh cherries, one cinnamon stick, and 1/3 cup of sugar or Truvia.

Add the vanilla extract, chocolate extract, and spiced rum to the cherry mixture.

Heat mixture on a medium-high stove until it starts to rapid boil, stirring frequently.

After approximately 10 minutes, the cherries will soften, and the rum will have cooked down to create a thin sauce.

Using a spoon, ladle a few teaspoons of sauce from the cherries into a small container, and add flour and stir briskly, avoiding any lumps. This creates a slurry or a thickening agent for the cherries. Add the slurry back to the cherry mixture and stir well. Reduce heat to medium-low and let thicken for another 10 minutes, stirring intermittently. Turn off heat after the 10 minutes and let cool completely in the saucepan.

While the cherries are cooling, unroll the two ready to bake pie crusts, and using a small glass or biscuit cutter, cut out 24 circles. Place them in the mini muffin tins to create tartlets.

Bake the tartlets off at 350° for about 12 – 15 minutes or until golden brown.

Remove the tartlets from the mini muffin tins, and set aside to cool. Once the tartlet shells and cherries have cooled, spoon some of the cherries into each of the tartlet shells.

Place a dollop of sweetened whipped cream atop each tartlet, and then shave the bar of dark chocolate over the tartlets using a Microplane.

Cooking the cherry mixture and baking off the tartlet shells can be done a day or two ahead of time. And, you can fancy up the tartlets by creating ribbons of chocolate over top, too. This is an amazingly decadent dessert that you can make in no time!

Whether you make them for the holiday party or if you keep them all to yourself to enjoy by the fireplace (you know I’m not judging), you will absolutely love these Chocolate Cherry Rum Spiced Tartlets!

Thanksgiving Stuffed Winter Acorn Squash

Winter is coming! Thanksgiving is just around the corner, and while many of our tried and true traditional dishes are top of mind, I’m always game when it comes to trying something new, especially if it’s seasonal and easy!

Acorn squash is my absolute favorite winter squash, and this Thanksgiving Stuffed Winter Acorn Squash recipe knocks out two dishes in one, the veggie and the stuffing. And, it’s also a lovely side dish for any roast chicken, duck, or cornish game hen dinners you might be planning this holiday season. Or, if you’re like me, it can serve as dinner on its own! One Acorn Squash serves two people.

Ingredients:
2 Acorn Squash
Olive Oil
Salt/Pepper
16oz Your Favorite Sausage (Sage, Fennel, or Sweet Italian work well)
1 Onion, diced
2 Leek Stalks, split lengthwise and diced
3 Celery Stalks, diced
1 Red Bell Pepper, diced
1/4 Cup Fresh Flat Leaf Italian Parsley, chopped
3 TBS Fresh Rosemary, chopped
3 TBS Fresh Sage, chopped
1/3 Cup Pecans, chopped
1/4 Cup Dried Cranberries
1 Package King’s Hawaiian Classic Stuffing, Herb & Onion
Chicken Stock (optional)

Preheat oven to 375°.

Cut 1/4 inch off the top and bottom of each acorn squash so they sit flat and even.

Core the seeds using a spoon to scoop them out, and discard the seeds.

Drizzle each side of the acorn squash with olive oil, then salt and pepper. Place in a baking dish, and bake at 375° for 30 minutes, turning over half way.

While the acorn squash is roasting, chop your onion, leeks, celery, and bell pepper and set aside in a bowl.

Then, chop your parsley, rosemary, sage, and pecans. Set aside, along with your cranberries.

In a large dutch oven, drizzle olive oil, and then sauté the onion, leeks, celery, and bell pepper on medium high heat for approximately 4-5 minutes. Season with salt and pepper. Then, add sausage and cook sausage through.

Add King’s Hawaiian Classic Stuffing Herb & Onion to the mixture and continue cooking on medium-high heat until combined and the stuffing starts to absorb the moisture from the mixture. If it appears too dry, you may add a splash of chicken stock to the mixture. Be careful not to add too much liquid to avoid becoming mush.

Add the parsley, rosemary, sage, chopped pecans, and cranberries to the mixture and incorporate well. At this point, the acorn squash should be ready. Fill and mound the empty core of the acorns with the stuffing mixture.

Bake the stuffed acorn squash at 375° for 35-45 minutes or until stuffing is golden brown and the place smells amazing.

Happy Thanksgiving, and enjoy!


Day After Thanksgiving Breakfast Muffins

It’s getting close to Turkey Day, and that means we have some important planning to do.

We have to plan the seating arrangements to ensure all relatives leave unscathed from the annual table conversation (this year should be super fun), and let’s not forget the critical decision regarding which pair of stretchy pants will be worn after the main meal. However, the most important decision you’ll have to make this Thanksgiving is what in the world to do with your leftover stuffing!?!

Have no fear. I’ve got the hookup thanks to my pals over at Empire Baking Company in Dallas, Texas.omgs-dfw-food-omg-baking-at-empire

Saturday I had the pleasure of hanging out to do a sponsored demo all day at Empire, and I created a recipe specifically for them, featuring some of the ingredients sold at their location. Every Friday from now until Thanksgiving, Tamie, Empire’s manager, is creating different dressings using Empire’s amazing bread and products. This past Friday, Tamie put together her grandmother’s famous traditional Texas dressing to sample (it’s sooooooooo goooood), and just like the day after Thanksgiving, we had some dressing left over on Saturday.

So, our focus was all about creating an easy recipe that utilized the leftover stuffing! And, the coolest part is that this recipe works with any dressing recipe – yours included. (Don’t know if you noticed my alternating “dressing” and “stuffing” – for our purposes, they mean the same thing.)

Let’s get started!

Day After Thanksgiving Breakfast Muffins
Yields approximately 8 dozen mini muffins or 2 dozen regular muffins

Base:
16 oz Sage or Spicy Breakfast Sausage (sub 12 oz Applewood Smoked Bacon, diced)
½ Onion, diced
2 TBS Butter
8 Cups Your Refrigerated Thanksgiving Dressing/Stuffing, crumbled
1 Cup Shredded Cheddar Cheese
3 TBS Valentina Picante Salsa (sub your favorite hot sauce)

Custard:
2 Whole Eggs
4 Egg Yolks
1 Pint Heavy Whipping Cream
2 tsp Chef Milton Atlantic Sea Salt with Rosemary (Found at Empire Baking Company)

Optional Glaze:
Luscombe Farm Jalapeño Pepper Jelly (Found at Empire Baking Company)

Preheat oven to 375°. Butter muffin tins or use a non-stick baking spray to coat the tins.

In a skillet, sauté breakfast sausage until cooked through and set aside to cool. If subbing bacon, cook until bacon is crisp, drain completely, then set aside to cool. In the same skillet, add butter and onion. Sauté until onions are tender and the fond (brown/caramelized goodies stuck to the bottom of the pan) releases from the pan.

omgs-dfw-food-butter-in-pan

Once the onions are tender, remove from pan and set aside with sausage or bacon to cool.

omgs-dfw-food-sausage-and-onionsomgs-dfw-food-bacon-and-onion-prep


In a medium bowl, whisk together eggs, yolks, cream, and Chef Milton Atlantic Sea Salt with Rosemary. Set aside.

omgs-dfw-food-sea-salt-with-rosemary

In a large bowl, add crumbled dressing, shredded cheddar cheese, and cooled sausage or bacon and onions.

omgs-dfw-food-cheese-and-sausage

Combine thoroughly.

omgs-dfw-food-crumble-mix-combined

Pour the custard mixture over the dressing mixture and fold until well incorporated. The mixture will be moist.

omgs-dfw-food-pouring-custardomgs-dfw-food-muffin-mixture

Add in the Valentina Salsa Picante or your favorite hot sauce to add another layer of flavor and mix thoroughly.

omgs-dfw-food-valentina-picante-salsa

Using a 1-inch cookie scoop, scoop the mixture into greased mini muffin tins.

omgs-dfw-food-mixture-scoop omgs-dfw-food-ready-to-bake


Bake at 375° for 17-20 minutes or until crispy on top and golden brown.

omgs-dfw-food-post-bake

For some added sweet heat, add a small dollop of Luscombe Farm Jalapeño Pepper Jelly to the top of each muffin right before the last five minutes of baking is up, and place back into the oven to create that amazing caramelized glaze.

omgs-dfw-food-luscombe-farm-jalapeno-pepper-jelly

omgs-dfw-food-day-after-thanksgiving-breakfast-muffins-with-jalapeno-pepper-jelly

For regular sized muffins, bake for 30-35 minutes or until crispy on top and golden brown. Let cool for 7 minutes to allow the muffins to set before removing from muffin tins.

Saturday’s adventure, recipe ingredients, and post featuring specific products were sponsored by Empire Baking Company.   

Easy Halloween Treats

What’s up Ghosts and Goblins!?! Happy Halloween!

To get into the Halloween spirit, I put together a 10-minute Halloween episode featuring three of my favorite, easy spooky snacks: Empanadas, Buñuelos, and Champurrado!

OMGs DFW Food - Empanadas OMGs DFW Food - ChampurradoOMGs DFW Food - Buñuelos

We even captured a scary moment on tape – I’m serious. We had a supernatural visitor or something. Very Halloweeny!

I’m fairly certain I angered the Pumpkin King with all my empanada making. Anyway, check it out!

Stay safe out there this Halloween! Make these scary snacks, enjoy the night, and be sure to think about your pets! Keep them safe from bad monsters by bringing them inside for the night!

Lazy Fajitas at Home

Sometimes you just need fajitas a la pajamas. In other words, you don’t have to get all doodied up to head out to your local Tex-Mex joint to have grito-inspired fajitas. You are 100% capable of delivering superstar, melt-in-yo-mouth steak, chicken, and shrimp fajitas from the convenience of your own kitchen in the convenience of your own chones pajamas (dangerous to cook in chones – let’s not be that lazy).

We’ve all been there. Sometimes ya just don’wanna. And, that’s okay! Because I have the hook up for you, and it doesn’t even involve going outside to start up the grill. Plus, it’s much cheaper, and the margaritas are endless when you’re making them at home. And, while I don’t usually promote shortcuts, this definitely does the trick for a lazy day.

First, if you’re having a super lazy day and you don’t even have any groceries, have no fear. Favor is here. While it’s not available everywhere yet, it covers most major cities, including the DFW metroplex and far North Dallas. It’s a magical button that lives in your phone as an app that you download, and when you ask it to do you a favor and pick up groceries, guess what??? Someone shows up a while later with all of the groceries you’ve asked for and no cash to exchange because you set up your account when you downloaded the app! I discovered this app back in July, and truth be told, because we love it so much, Bear decided to start running for Favor. No one is paying me for this, by the way. I’m just sharing the love because everyone deserves to have the option to stay at home in their pajamas every now and again while someone else does their grocery shopping. It works for food delivery and all sorts of things, but we’re focusing on the grocery hook up today.

Grocery List:
1 Large Tomato
1 Medium Onion
1 Red Bell Pepper
1 Large Avocado
2 Limes
1 12oz Ribeye Steak
1 Large Boneless Skinless Chicken Breasts
8 Peeled and Deveined Shrimp (cooked or raw works)

Now, if you do not have salt, garlic powder, cumin powder, and olive oil as part of your pantry staples, I’m very disappointed, but we’ll talk about that later. Just add those to the list if you don’t have them on hand.

If you also do not have quality tequila in your freezer, that’s okay. Not everyone is as awesome as I am. Not to mention, you don’t actually need the tequila for the recipe, but if you have it, HIGH FIVE! You’ll need about four splashes (4 Tablespoons) to make the fajitas.

Once you have everything, get your prep work done.

French the onion and slice the bell pepper into thin strips and set both aside in a bowl. Slice the tomato into 1/4 inch discs, salt, and set aside.

Don’t know how to french an onion? No problem. I got you:

Now, cut the avocado in half. Take the pit of the avocado out, then using a spoon, scoop out the avocado meat, mash up with a fork, add salt, a squeeze of lime, zest of 1/2 lime, and a dash of garlic powder and ground cumin. Stir. Holy guacamole, Batman! Set aside.

This is when you start up your cast iron comal (flat griddle) or cast iron skillet on medium high heat.

Butterfly or pound out the chicken breast to ensure it is similar in thickness across the whole breast. If I lost you at “butterfly,” just pound out the chicken breast and don’t worry about being Michael Phelps.

Season the onions and bell peppers, chicken breast, steak, and shrimp in separate bowls using the following ingredients for EACH bowl:

1 Tablespoon Olive Oil
1 Tablespoon Tequila
1/2 Teaspoon Fresh Lime Juice
1/4 Teaspoon Salt
1/4 Teaspoon Ground Cumin
1/4 Teaspoon Ground Garlic Powder

At this point, the cast iron comal should be screaming hot. Cook the ribeye first. Be sure to turn on your vent fan unless you want the fire department to show up while you’re in your pajamas. It will likely smoke but not for long. Cook the ribeye for approximately 6-7 minutes each side for medium-rare to medium. Once the steak is cooked to your preference, remove from the heat and let it rest.

Next up, chicken! Cook the chicken for 7-8 minutes each side. If you did not pound or butterfly the chicken, you’ll have to cook it longer until it comes to 160-165 degrees using a thermometer in the thickest portion of the chicken breast. Once the chicken is cooked thoroughly, remove from heat and set aside to rest.

Add the shrimp to the comal in a single layer. If you are using cooked shrimp, just heat through and flip to ensure you create a little char on the seasoned shrimp. If you’re using raw shrimp, cook for about 2-3 minutes each side or until the shrimp begin to curl into a c-shape. If it curls too much, you’ve overcooked the shrimp. So, keep watch and remove from heat when ready.

Then, add the onions and bell peppers to the comal and cook until the onions become tender but not translucent. This will leave a little bite to the veggies but keep that nice charred flavor in the mix. Remove the veggies from the comal. Lastly, add the tomato discs to the comal and char on each side, approximately 1-2 minutes each side.

Dress your ribeye with some grilled onions, tomato discs, and guacamole. Slice the chicken or serve whole with the shrimp and veggies, along with slices of lime.

OMGs DFW Food - Fajita Style Ribeye Steak

You now have the most amazing meal, all done in your jammies! The best part is that you also have tequila and lime at the ready; so, you can even enjoy some margaritas along with your lazy fajitas!

Get Your Whistle Britches On

Earlier this summer, one of Dallas’ brightest star chefs, Omar Flores, partnered up with Alec Marshi to open Whistle Britches, a Southern-inspired casual restaurant focused on killer fried chicken, biscuits that only grandma could make, cold beer, and all the picnic fixin’s you could want in far North Dallas.

There’s been quite a bit of talk about it. Having just met Chef Flores at the Chefs for Farmers event last weekend and hearing mostly positive reviews about Whistle Britches, when a friend of mine mentioned her phenomenal experience, I couldn’t put it off any longer.

omgs-dfw-food-whistle-britches-dining-room-bar

My first thought as the doors opened was, “Wow. This is really bright and open!” I loved it. It was a much lighter and inviting atmosphere than its previous space owners had created, and we absolutely loved the outdoor patio. Bright colors, fun fixtures, and natural lighting really make the space impressive and fun. The outside area has colorful chairs and an open deck perfect to enjoy now that the weather calls for outdoor seating. However, for this particular visit, we kept it indoors since e’rybody was showing up. We were celebrating my dad’s birthday!

omgs-dfw-food-whistle-britches-jalapeno-pimento-cheese

To save time while everyone arrived (and mostly because it says it’s a 30 minute wait time), we ordered “The Whole Bird” for the table and some appetizers. Let me tell you; even if you just want a little afternoon snack, get your whistle britches over there and order the “Pickled Jalapeño Pimento Cheese.”

Guuuuuuuuuuuurl, I could eat that entire thing with a spoon and a blanket in a corner all by myself. It was such a comfort food champion; I don’t even know what to tell you. Their saltine crackers are house-made, very on-trend at the moment, but there was nothing “trendy” about how those crunchy chile-flaked wafers of deliciousness worked magic in combination with that pimento cheese to transport me directly into a huge wooden rocking chair on somebody’s grandaddy’s front porch somewhere in the South. North Dallas was not the vibe that app was rockin’. It was a tip of the hat to Southern cuisine in one unassuming countrified bite, and it was amazing.

We also enjoyed their wonderful “Creamed Corn Hoecakes;” however, the hoecakes arrived a little underdressed, as their pats of butter had flown off the side in the journey to the table. So, I didn’t get a great shot of those. They were very light and delicious, but they ain’t no pimento cheese.

omgs-dfw-food-whistle-britches-biscuit

When the main event arrived, the first thing that captured my nose’s attention was the lovely waft of butter dancing across my senses, coming from the ridiculously and generously sized biscuits on the table, alongside sweet local honey butter and a blueberry jam sent from the gods. They arrive as four, but Grandma Ollie snagged one right as I was taking a shot, and I don’t blame her. They were dreamy.

omgs-dfw-food-whistle-britches-chicken2

Immediately thereafter, all eyes were on that beautiful basket of chicken. What I remember before passing out from joy was the hot, crispy herbed crust being so unique. There was a definitive note that really separated this fried chicken from what one would expect. And, I’ve had me some fried chicken, my friends. This was special. The crust adhered so perfectly to the chicken, and the wonderful aromas circling the table were intoxicating. Even thinking of it now, I can recall that herbaceous note of the crust without being heavily crusted with herbs. It was certainly memorable.

omgs-dfw-food-whistle-britches-dinner2

Sides included were their creamy chive potato salad and light vinegar coleslaw. The consensus at the table was that the sides were “okay” while the fried chicken blew everyone away and the biscuits were a soul-touching experience. One side worthy of mentioning though was the macaroni and cheese. Goot Lort, it was mac’daddy delicious. Definitely get you some of that when you go.

omgs-dfw-food-whistle-britches-mac-n-cheese

We were most impressed with the pimento appetizer, biscuits, and chicken overall – which is probably how it should be! Their moniker bears the trio ‘Chicken – Biscuits – Beer;’ so, I would hope those would be the highlights! We didn’t get to the beer this time but believe me… there will be a next time.


omgs-dfw-food-whistle-britches-menu2

To Tamale or Not To Tamale… That is the Question

Once a year I get this harebrained idea (which I believe stems from my upbringing) that urges me to spend two 19-hour days back to back, standing in a hot kitchen, working with argumentative ingredients that ultimately result in a severe backache and the euphoria that comes from eating a homemade tamale with a hot cup of coffee. Continue reading “To Tamale or Not To Tamale… That is the Question”

Texas Breakfast Taco Battle

Although the state food of Texas is officially chili, most Texans would agree that the breakfast taco should really hold that title.

Growing up in South Texas, the breakfast taco was a daily way of life and an even bigger deal on weekends when barbacoa came out to play. For those who aren’t familiar, barbacoa tacos fall into a special category, “solo el fin de semana,” or just the weekend. Much like menudo and pozole, barbacoa breakfast tacos are usually reserved for Saturday and Sunday only.

I remember we would head to my Uncle Turi’s (short for Arturo) house where we experienced our version of the culinary holy trinity, the trifecta of Sunday breakfasts: menudo, pan dulce, and breakfast tacos (barbacoa included). My Aunt Adelma has always been the official family “madrina de menudo,” the godmother of this most prized Mexican delicacy. She’s like a magician in the kitchen, and to this day, I have yet to figure out what she does differently that makes it so incredibly amazing. I’m getting hungry just thinking about it. But, I digress…

Even now, being in North Texas, it’s a Sunday tradition to bring breakfast tacos over to my brother’s house where everyone, including my 97-year old Grandma Ollie, gently tilts our heads to lovingly usher in the fluffy, yet toasted, flour tortilla, edges bursting with heavenly combinations of bean and bacon, potato and egg, chorizo and egg, and of course, barbacoa.

So, it should be no surprise that my history with and my passion for breakfast tacos recently lead me on a spectacular breakfast taco-filled journey when I was chosen to be a guest reporter for Verify, a television show that takes interested viewers on road trips to seek answers to life’s most pressing questions, like “What’s the Breakfast Taco Capital of Texas?”

For two days, we traveled through Austin and San Antonio, tasting the best breakfast tacos each city had to offer, and in the end, I had to choose which city would reign supreme in the Texas breakfast taco battle. Talk about controversial decisions. Anyone see what happened to the last guy who spoke up about the subject? Sensitive topic much?

And, during the week of September 12, 2016, the state of Texas will find out my decision, and hopefully, I won’t be banned from either city (or any city across Texas for that matter).

I love Texas! I love breakfast tacos! I love all tacos!

Now, one would think that after two days straight of nothing but breakfast tacos, it would have some sort of negative impact on my affection for the tasty Texas treats, and yet, no – it did not.

In fact, that’s exactly the opposite of what happened.

The day I returned, and every weekend since (just as it’s always been) I either made or purchased breakfast tacos. For me, it’s about a sense of home.

I can remember early mornings at my grandparents’ ranch as a small child, watching Grandma Ollie masterfully lead a sort of ballet where each long, thin strip of bacon danced with her wooden spoon until they furled gracefully into their perfectly crisp positions in the cast iron skillet.omgsdfwfood - 300 breakfast tacos bacon

Next would come the potatoes, every piece a blank canvas with nothing but that aromatic, smoky base as the paintbrush, adding the perfect amount of salt over each rich, caramelized cube. omgsdfwfood - 300 breakfast tacos fried potatoesThen, the beans would enjoy a bath in that bacony goodness until every one of them had weakened under pressure and transformed into the perfect creamy base for the breakfast taco, refried beans.omgsdfwfood - 300 breakfast tacos refried beans

To this day, I still follow her steps when preparing breakfast tacos at home. The breakfast taco really means so much more to me than a humble meal in the morning or a Texas tradition, even. It’s about my culture, my history, my family – my own Texas experience.

Having to choose between two cities, knowing there were so many other Texas cities not represented, was extremely difficult for me. I found myself getting teary-eyed whenever I thought too long about not being able to include the Rio Grande Valley or Corpus Christi, my South Texas, in my decision. I felt like I was denying the existence of hundreds of little taco stands, taco trucks, breakfast taco joints, and too many family kitchens that were all more than worthy of having a shot at the title. I felt silly that this responsibility was weighing so heavily on my soul, and yet, I felt compelled to try and weave in my concerns at every turn – all because that’s how much it meant to me!

Poor David Schechter can attest that I must have mentioned the variety of breakfast tacos that weren’t in the running at least 50 times while on the road. By the end of the trip, I am positive I interjected my concerns on camera enough times to possibly make it through editing – next week will tell.

And, it was all for the love of my beloved Texas breakfast taco and the desperate need to represent my culture, my history, and my food family well. I truly took this decision to heart.

I’m a proud Texan. I love both Austin and San Antonio. So, when you watch the show during your evening news the week of September 12thon any Texas Tegna station, know that I took the responsibility seriously and had my own personal breakfast taco battle going on internally, one that wasn’t easily calmed with anti-acids.

In the end, I know I made the right decision based on a very clear set of criteria, and I’ll stand by that decision when it comes out.

For now, I’ll just sit back and have a snack… perhaps one of several breakfast tacos I brought back from this past weekend getaway to Austin and San Antonio.OMGs DFW Food - Texas Breakfast Tacos


Divine Secrets of a Ya-Ya Get-Together (Cocktail Party)

Do y’all remember The Divine Secrets of the Ya-Ya Sisterhood? It was that Sandra Bullock film where a group of lifelong friends attempts to rescue a relationship between a mother and a daughter. The movie was a’ight, but more importantly, the part I want to focus on is actually having a Ya-Ya Sisterhood, that group of “ride or die” friends who would do just about anything for you.

Every month (or the first available moment the planets align with all of our schedules), two of my lifelong sister-friends and I hang out for a Ya-Ya Get-Together. It’s when we unplug, forget about the craziness in our lives, and relax with copious amounts of wine and hors d’oeuvres. There are only two rules: each Ya-Ya has a rotation as Get-Together hostess, and the hostess must provide a bottle(s) of wine none of the Ya-Ya’s have tried so we can try it together.

Basically, we have created an excuse to have a mini-cocktail party for just the three of us as often as possible. You get the picture.

This particular spread was my turn hosting a Ya-Ya Get-Together that just happened to double as a birthday celebration for one of the Ya-Ya’s!

OMGs DFW Food - Cocktail Party

Don’t judge. I know this may appear a little overboard for three of us, but you have to remember this is at least a four-hour affair. That’s a long time to be talking and laughing – we need sustenance! Plus, this was special birthday party Ya-Ya material.

In order to prepare for the evening, I took a little trip to one of my absolute favorite culinary destinations in Texas, Central Market. (While I used to work there many, many moons ago, I have zero affiliation with them now, aside from the fact that I’m completely in love with them and still openly profess my love for everything Central Market.)

In less than one hour, I had everything I needed to set out a spread worthy of the Ya-Ya’s. Plus, I even had time to make a pitcher of some lovely Lemon Mint Water.

For the appetizer bites, I bought ready-made mini tart shells and filled them with Central Market’s uh-MAZING Pimento Cheese and creamy Spinach Artichoke Dip. To make it my own signature snack, I fried up some bacon and crumbled the smoky bits neatly over each spinach hors d’oeuvre, then minced up some parsley and sprinkled the parsley over the cheesy pimento tarts.

OMGs DFW Food - Cocktail Party Hordeurvres

For the center cheese board, all I did was take my handy-dandy John Boos cutting board and line up five different cheese options, a hard, soft, goat, cheddar, and smoked, onto the board. Grapes, figs, pears, and strawberries will always find a buddy on the cheese board, and with a little peppered salami, sweet cured salami, and cracker choices, we were set to go! The decorative pieces were simply rosemary sprigs and a few small bowls of Marcona almonds and olives. Simple, quick, and easy!

Pastries were there because of the birthday celebration, but if you’re in Texas and looking for some incredible individual desserts for birthdays or just because you deserve a slice of chocolate cake, Central Market has the hookup!

North Texans, if you haven’t ventured into one of their five DFW locations, RUN; don’t walk! And, go on a Saturday to have the full experience of Foodies offering samples at every corner and of local bands playing live music while you shop! Everyone else in the world, Central Market has several locations across our great state. So, please be sure to visit a Central Market if you come to Texas!

Needless to say, post Ya-Ya Get-Together, in the wee hours of the morning, not a morsel was left. I love my Ya-Ya Sisterhood and our Get-Togethers, and I certainly hope this inspires you to start your own Ya-Ya Get-Together tradition with your friends, lifelong and new alike!

_______________________

Lemon Mint Water
2 Large Lemons Sliced
2 Bunches of Mint Leaves Roughly Chopped
Water
Ice

Muddle the sliced lemons and chopped mint leaves at the bottom of a pitcher. Add water and ice to fill. Then, enjoy this refreshing beverage!

Winner! Winner! Turkey Pastrami Dinner!

Winner, winner Turkey Pastrami Dinner! Or, lunch, as it were!

The Sun-Kissed Turkey Pastrami Sammy won Empire Baking Company‘s Back to School Sandwich Making Contest!!! They’ll be serving up this flavor bomb from 12-4p at their Inwood/Lovers Lane location on Friday, August 26th! Continue reading “Winner! Winner! Turkey Pastrami Dinner!”

Italian Basil Bomb Sammy

In the spirit of doing everything possible to win a sandwich making contest, here’s another entry I submitted, and it is SOOOOOOOOOO GOOOOOOOOOOD! Plus, I got to do my best Giada impression when I made my recipe video. “SO-pre-SSA-ta!” Continue reading “Italian Basil Bomb Sammy”

Summoned by the Empire: Buffalo Bacon Sammy

Every year, D Magazine puts out a “Best of Big D” list – it’s basically a “where to find the shiznit” list of anything and everything in Dallas. It was no surprise this year when Empire Baking Company was named Best of Big D Bakery for Bread. Having run full-production bakeries in a past life and having been schooled on more than one occasion by some of the most passionate, tattoo-covered, lovable, foul-mouthed, “bread is life,” under cover of night, master baker beasts, I can tell you, Empire has some killer bread.

So, as you can imagine, when Empire’s blog posted a Back to School Sandwich contest focused on using their bread, I was all over it. The contest ends Friday, August 19th; so, I still have another day to submit more sammies, but this one deserves to be shared even if I don’t win. The rules are: 10 ingredient limit, serve cold/room temp, and make it simple, nice, and tasty. Here’s what I came up with…

omgsdfwfood - empire baking contest ingredients

Servings: Yours and Only Yours
Time: 10 mins
Difficulty: Easy

Ingredients


– 2 Tablespoons Butter (softened)
– 1 Teaspoon Buffalo Hot Sauce
– 2 Slices Empire Baking Company Pane Paisano
– 1 Celery Stalk
– 2 Tablespoons CHUNKY Blue Cheese Dressing
– 3 Slices Bacon (that fourth one can be used as a snack; that’s what I did)
– 4-6 Deli Slices Buffalo Chicken Breast
– 1/2 Cup Baby Spring Mixed Greens


omgsdfwfood - empire baking contest toasting bread

Cook your bacon until it’s crisp, set aside the bacon, and discard the bacon renderings. Or, save the renderings if you know what’s good for you. Don’t wipe out the skillet! Just be patient, my friends. Glorious deliciousness awaits you. Take the skillet off the heat for this next part. Mix the Buffalo sauce and the softened butter together just to combine. Don’t freak out when the vinegar doesn’t play nice with the butter. Just keep stirring around to incorporate most of the sauce. Then, take a butter knife and slather one side of each Pane Paisano slice with the Buffalo butter (I like that – “Buffalo butter”), then place the buttered side down in the skillet where you cooked the bacon. Then, return the skillet to medium-high heat to toast up only that one side of bread. That’s right. I said one side only. You’ll see…

IMG_6220

Once the one side is golden brown, remove from the skillet, and place the two slices of bread aside, leaning on one another to cool. This just makes the process go faster. While your two toasted slices are cooling, take your celery stalk, and slice it thinly on the bias. The idea is that you’ll be adding the celery for texture, but it can’t fall out of the sammy. Thus, no dicing.

IMG_6221

Once the Pane Paisano slices are cooled, place them toasty side down, and spread the chunky blue cheese dressing onto the soft side of the bread. The softer side will absorb the blue cheesiness, and the chunks of blue cheese will fall into the wonderful crevices and pockets of joy in the bread. If you had toasted both sides, you’d have to smush the crispy bread to spread the blue cheese. See? There you go. One-sided toasting is muy importante for this sammy.

IMG_6222

Now, take your thinly sliced celery, and cover one side of the sammy, making sure you are strategically placing the celery so that every bite gets that textural crunch. The blue cheese will act as your glue here so the celery won’t slide off.

IMG_6224

Next, layer your Buffalo chicken deli slices, bacon, and baby spring mix. Close up the sammy with the other slice, and enjoy the tangy zing of the Buffalo sauce against that creamy blue cheese and salty, smoky bacon. I can’t wait to turn this bad boy in for the contest… wish me luck!

Incidental Potato Zucchini Bake

Two days ago, we were facing a real dilemma: three zucchini squash were on their last leg in the fridge, and we had a decision to make.

The zucchini were still firm and weren’t anywhere near the “what is that?” stage, but they had definitely seen better days. I knew rosemary lemon chicken was on the menu; I knew we had potatoes, cheese, and cream, and I knew there was enough love and determination to make this potato zucchini bake happen. So given the circumstances, it was on like Chaka Khan. Continue reading “Incidental Potato Zucchini Bake”